
Last updated November 15, 2026
 Architectural shingles
 Metal roofing
 Tile roofing
 GAF
 Owens Corning
 Flat & low-slope
Free roof inspection with deck photos before we talk money - GAF and Owens Corning certified installation
Roof Repair Maintenance Checklist for Pompano Beach Homeowners
The most common repair call we get after a Pompano Beach storm isn’t wind damage. It’s a fastener or a piece of flashing that was already loose six months earlier and got skipped on the last “inspection.” Most maintenance checklists hand you ten generic tasks copied from a national template. That template was written for a climate that isn’t yours. Pompano Beach roofs face a specific set of stressors: intense UV, salt air on the homes near the Intracoastal, tropical downpours in the wet season, and an annual hurricane ramp-up. This guide maps the tasks to that timeline. Not the calendar. The threats. You’ll learn what actually prevents leaks, what’s a contractor upsell, and how to document your roof so a future insurance claim has a chance.
Quick Answer
A roof maintenance checklist for Pompano Beach should follow the local weather calendar, not the four seasons. That means tightening and inspecting in the dry months (roughly November through April), pre-hurricane prep in late spring, and a documented post-storm assessment after every named system. The five highest-risk spots on a Pompano Beach roof are the fasteners, the flashing at penetrations, the roof-to-wall junctions, the valley areas where water concentrates, and the underlayment at edges. Most of these fail invisibly from UV and heat long before you see a stain on the ceiling.
Styles & brands we work with
- Architectural shingles
- Metal roofing
- Tile roofing
- GAF
- Owens Corning
- Flat & low-slope
Table of Contents
- Why a Generic Checklist Fails a Pompano Beach Roof
- The Month-by-Month Task Calendar for South Florida
- The Five Places Damage Shows Up First
- How to Spot Trouble From the Ground
- Attic-Side Checks That Catch Water Before the Ceiling Does
- Maintenance Tasks That Prevent Repairs vs. Tasks That Don’t
- How to Photograph Your Roof for a Future Insurance Claim
- Common Mistakes to Avoid
- When to Call a Professional
Why a Generic Checklist Fails a Pompano Beach Roof
Most roof maintenance guides are written for a temperate climate. They talk about winter preparation, ice dams, and freeze-thaw cycles. None of that means anything in Pompano Beach. What actually shortens a roof’s life here is cumulative heat and ultraviolet exposure, plus the mechanical stress of wind-driven rain. A shingle that sits under the South Florida sun for a decade has been through a kind of constant weathering that a northern roof never experiences.
The bigger issue is timing. A homeowner who reads a magazine checklist in October and does their inspection “before winter” has aimed at the wrong month. In Pompano Beach, the window between wet seasons is the real prep window. That’s when you’d rather be doing roof repair than waiting until water is already coming in during a July downpour. The dry stretch from late fall into spring is the time to find and fix problems, because you’re working on a roof that’s dry and easy to inspect.
There’s also the insurance reality. After a storm, an insurer wants evidence that damage is storm-caused and not pre-existing neglect. A roof with no documentation history is a roof where the adjuster has room to argue. A maintenance log with dated photos changes that conversation entirely. That’s one of the reasons we push inspection as a genuine diagnostic step rather than a sales tactic. Your roof may need less than you think. Finding out before the storm is how you avoid the argument later.
The Month-by-Month Task Calendar for South Florida
This isn’t a strict calendar. It’s a map of the actual threat windows in Pompano Beach. Use it to decide what to check and when. The wet season typically runs from June into October, and the dry season is the rest. Work backwards from those two facts and the whole schedule makes sense.
Dry Season: November Through April (Tighten and Inspect)
This is the heavy-lifting window. The roof is dry, the weather is predictable, and any repair you do has time to settle before the rain returns.
- November – Post-season walk-through. A visual check from the ground, plus an attic scan, after the wet season ends. Look for any staining that showed up over the summer.
- December through January – The fastening pass. Check ridge caps, valley edges, and any loose shingles or tile. Wind loosens these over time and it won’t show as a leak until the next big rain.
- February – Flashing focus. Inspect the metal flashing at chimneys, vents, skylights, and the roof-to-wall junction. These are the workhorses of a leak-free roof and they take the most UV.
- March – Gutter and drainage check. Clear debris, check hangers, and confirm the water actually flows away from the house. Standing water at the edges is a slow killer.
- April – Sealant and penetrations. Any pipes, vents, or mounts that penetrate the roof need their sealant checked. UV breaks down standard sealants faster than most people expect.
Pre-Hurricane Prep: May
Late spring is your last chance to get ahead of the season. Trim any limbs overhanging the roof (a professional tree service, not a DIY ladder job on a windy day). Confirm that loose shingles or tiles are secure. Any tile that’s cracked or lifted is a candidate to become a missile in a storm and a leak source in its own right. This is also the moment to test that your roof is loaded properly – not just intact.
Wet Season and Storm Season: June Through October (Monitor and Document)
During the wet season, maintenance is mostly monitoring. Don’t plan major repairs in a monsoon. But do a documented walk-through after every named storm. Photograph the roof and the attic. Note the date. If you find damage, get it assessed while the timeline is fresh, because that’s what an insurance adjuster will want to see.
The Five Places Damage Shows Up First
In our experience, these are the five spots where a Pompano Beach roof starts failing before anything shows up inside the house. Check them in this order.
- The fasteners. On shingle roofs, the nails themselves back out or work loose under heat cycling and wind. On tile, the fastening system underneath is the invisible weak link. A lifted or loose shingle is often an alarm bell ringing about the nail above it.
- Flashing at penetrations. Wherever something passes through the roof – vent pipes, exhaust, skylights – the sealant and flashing around it is the first thing to fail. On a Pompano Beach roof, that’s compounded by year-round UV and heat that degrade the sealant faster than a mild climate would.
- The roof-to-wall junction. This is where the roof meets an exterior wall or parapet. It’s an unusual profile on many modern Florida homes, and it’s a common entry point for water that gets pushed sideways by wind-driven rain.
- The valleys. Anywhere two roof planes meet, water concentrates. The valley is where any flashing or underlayment weakness becomes visible first, because that’s where the water volume is highest.
- The edge and underlayment. The perimeter of the roof takes wind from every direction. The underlayment at the edges – the layer beneath the shingle or tile – is what actually seals the roof, and it’s the layer that fails silently first.
We can usually tell a lot about a roof’s condition by walking it. But we can tell a lot more by looking at these five areas in a specific order, with a camera in hand. If your roof is reaching the point where a patch won’t hold, that’s when we bring in roof repair as the first line of defense rather than jumping to replacement.
How to Spot Trouble From the Ground
You shouldn’t be climbing on your roof. Not for a routine maintenance check, and especially not after a storm. What you can do from the ground is enough to know whether it’s time to call someone. Use binoculars if you have a longer roof line.
- Walk the perimeter. Look at the roofline against the sky. A sag or a dip is a structural sign. Don’t miss it.
- Check the shingle edges. Look for shingles that are curling, lifting, or missing entirely. Curling is the classic UV and heat failure on a South Florida roof, and it’s visible from the street.
- Check the gutters for granules. A handful of asphalt granules in the gutter is normal wear. A thick layer after a rain means the shingles are shedding their surface coating and aging faster than they should.
- Look at the flashing around any chimney or skylight. Anything that looks rusted, pulled away, or freshly sealed without a matching repair underneath is a red flag.
- Check the valleys. Get to a low angle where you can see into the valleys. Dark staining or visible gaps in the flashing are what you’re looking for.
- Check for debris at the roof edges. Shingle pieces, broken tile, or metal flashing in the yard after a storm is a direct sign of damage.
Salt air is the wildcard. On homes close to the Intracoastal or the beach, the same UV and heat damage is joined by salt-laden moisture that accelerates the breakdown of metal flashing and fastener corrosion. If you’re near the water, the visual check is more important, not less. That doesn’t mean every roof near the water needs replacing. It means you should be checking those five spots more often, and a professional inspection in Pompano Beach is worth doing before the weather gets a chance to prove you wrong.
Attic-Side Checks That Catch Water Before the Ceiling Does
Here’s the thing about a ceiling stain: by the time you see it, water has been moving through the roof and through the decking for a while. The ceiling is the last place the problem shows up. The attic is where you catch it early. Do this check from inside, with a flashlight, on a dry day – not during a storm.
Look for:
- Stained or dark decking. Look at the underside of the roof decking. Any discoloration, dark streaks, or soft spots where water has been creeping is a pre-ceiling-stage warning.
- Water tracks on rafters. Water follows the path of the rafters and can leave visible trails.
- Rusty nails. A rusty nail pointing down from the decking means water has been on the other side. Rusty nails or staples are one of the most underrated early warnings.
- Sagging decking or insulation. Soft spots and sagging are structural signs.
- Daylight through the deck. A pinprick of daylight is a hole. It’s also a place for water to enter.
- A musty smell. If the attic smells like a damp basement, something is getting wet that shouldn’t be.
- Electrical wiring stains or corrosion. If you see staining where wiring runs, stop and call a professional. Water and wiring don’t mix, and this is above a homeowner’s pay grade.
We can usually tell from an attic walk whether a roof is actively leaking or just aging. That’s the difference between a repair and a much bigger conversation. If your roof is reaching the end of its life and the attic is confirming it, a full roof replacement may be the honest answer, but only after a real diagnosis.
Maintenance Tasks That Prevent Repairs vs. Tasks That Don’t
Not every maintenance task is worth the money. Some of what gets sold as “roof maintenance” has a measurable return in avoided repairs. Some doesn’t. Here’s how we think about it.
Worth doing:
- Clearing gutters and drains. Standing water at the roof edge and against the fascia is a real source of rot and leaks. This one genuinely pays for itself.
- Re-sealing penetrations and flashing. Checking and resealing pipe boots, vent flashing, and the roof-to-wall junction is genuinely preventive. It’s cheap insurance, and it’s one of the most common causes of small leaks that become big ones.
- Replacing cracked or lifted tiles and shingles. A void in the surface layer means the underlayment is exposed to UV. That’s a fast track to failure.
- Attic moisture check. Catching water before it reaches the ceiling saves a lot of interior damage.
- Post-storm documentation. Free, and it can save a future insurance claim.
Often upsold without measurable return:
- Pressure washing the whole roof. Aggressive cleaning can strip the protective granules off asphalt shingles and reduce the roof’s life. On tile, it can also damage the surface finish. It has a place, but it isn’t a neutral maintenance task.
- Coating a failing roof to “extend its life.” It can buy time on some roofs. On others it’s a band-aid that hides a problem. It needs a real diagnosis first, not a blanket recommendation.
- Signing a long-term maintenance plan on a roof that’s already past its useful life. The money goes into treating symptoms. At some point the honest answer is that the roof is ready for replacement.
We work with seven roofing manufacturers – GAF, CertainTeed, Owens Corning, IKO, Atlas, Tamko, and Boral – which means when replacement is the right answer, we’re matching the right product to the roof, not pushing the highest-margin item. But that’s a downstream decision. The first job is to determine whether a repair fixes it. That’s why the name is Rutherford Roof Repair and not Rutherford Roof Replacement.
How to Photograph Your Roof for a Future Insurance Claim
Photos are worthless if they don’t establish the things an adjuster cares about: when the photo was taken, what it shows, and how it relates to a storm. Most homeowners take photos that don’t answer those questions. Here’s a method that does.
- Take wide shots first. A wide angle of each roof plane establishes context. Notes on the back of the photo, or a folder named by date, show what’s what.
- Get the specific damage close up. Wide shots show context. Close-ups prove the damage. Do both.
- Include a fixed reference point. A photo of a specific flashing, valley, or penetration – so that a later photo of the same spot shows the change over time. This is the single most useful documentation habit.
- Timestamp everything. Use a phone’s built-in metadata, or a small card with the date in the photo. Either works, but the date needs to be credible.
- Photograph the attic and the ceiling separately. Document interior signs, not just the roof surface. If water made it inside, that matters.
- Note the storm. Right after a named storm, take the photos the same day if you can safely do so. That timestamps the damage to the event, which is exactly what an adjuster needs.
- Keep the folder. Save it somewhere you’ll find it later, with the date in the folder name. Don’t let it live only on a phone.
The point isn’t that your insurance company is out to get you. The point is that without documentation, the question of pre-existing vs. storm-caused damage becomes a judgment call. With documentation, it’s a matter of reading the record. We can also do an inspection and provide a written record of what we found.
Common Mistakes to Avoid
- Waiting for a leak to start before you do anything. Water intrusion on a Pompano Beach roof often shows up inside weeks or months after the actual failure. By the time the ceiling stains, you’re already behind.
- Treating the maintenance checklist as a once-a-year event. In a place with a wet season and a dry season, the right cadence is at least twice a year, plus a post-storm check.
- Climbing on the roof to inspect it yourself. Ladders, steep pitches, and wet shingles are a bad combination. Use binoculars from the ground and a flashlight in the attic.
- Skipping the attic. The attic is where the early warning lives. If you only look at the roof from the outside, you miss the decking and the ceiling-side evidence.
- Calling a roofer and asking for a replacement quote before a repair quote. That’s the wrong order. The right order is inspection first, repair next, replacement only if the roof is genuinely past saving.
- Ignoring the flashing because the shingles look fine. Flashing fails before the shingle surface does. On a Pompano Beach roof, it’s the most common cause of a leak that “came out of nowhere.”
- Skipping the post-storm photo record. Free to do. Impossible to recreate. Take the photos.
The reason we hammer on this is simple. We repair first. Replacement is only recommended when it’s genuinely the right answer. That philosophy only works if homeowners are actually checking their roofs before problems progress. The checklist is the point. The repair comes later if it needs to.
When to Call a Professional
The things you can do from the ground are the things a homeowner should do. The things that should trigger a call are specific. Call a professional if you see: visible sagging in the roofline, water stains or discoloration on the ceiling or attic decking, loose or missing shingles or tiles after a storm, a rusty nail or a damaged flashing you can see from the ground, or a musty smell in the attic that doesn’t clear up. Also call if you’re simply unsure. The cost of a diagnosis is far less than the cost of a repair you didn’t need or a leak you ignored.
Rutherford Roof Repair offers free estimates in Pompano Beach – call (888) 361-4813. We answer 24/7. Fast dispatch from 7am to 7pm, Sunday through Friday. Our technicians have up to 9 years of experience, and we handle inspection, repair, and replacement under one roof, with materials from GAF, CertainTeed, Owens Corning, and other major manufacturers when a replacement is the honest recommendation.
See the difference
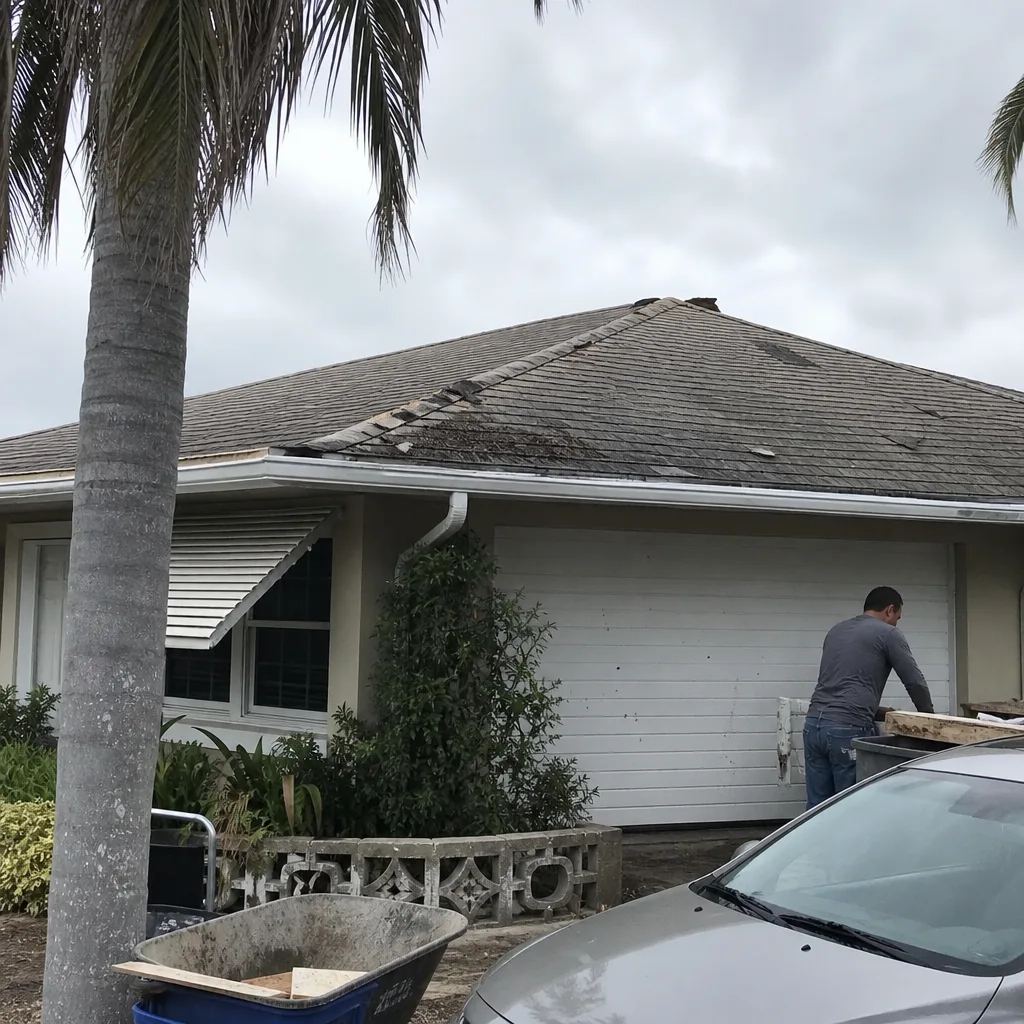 Before
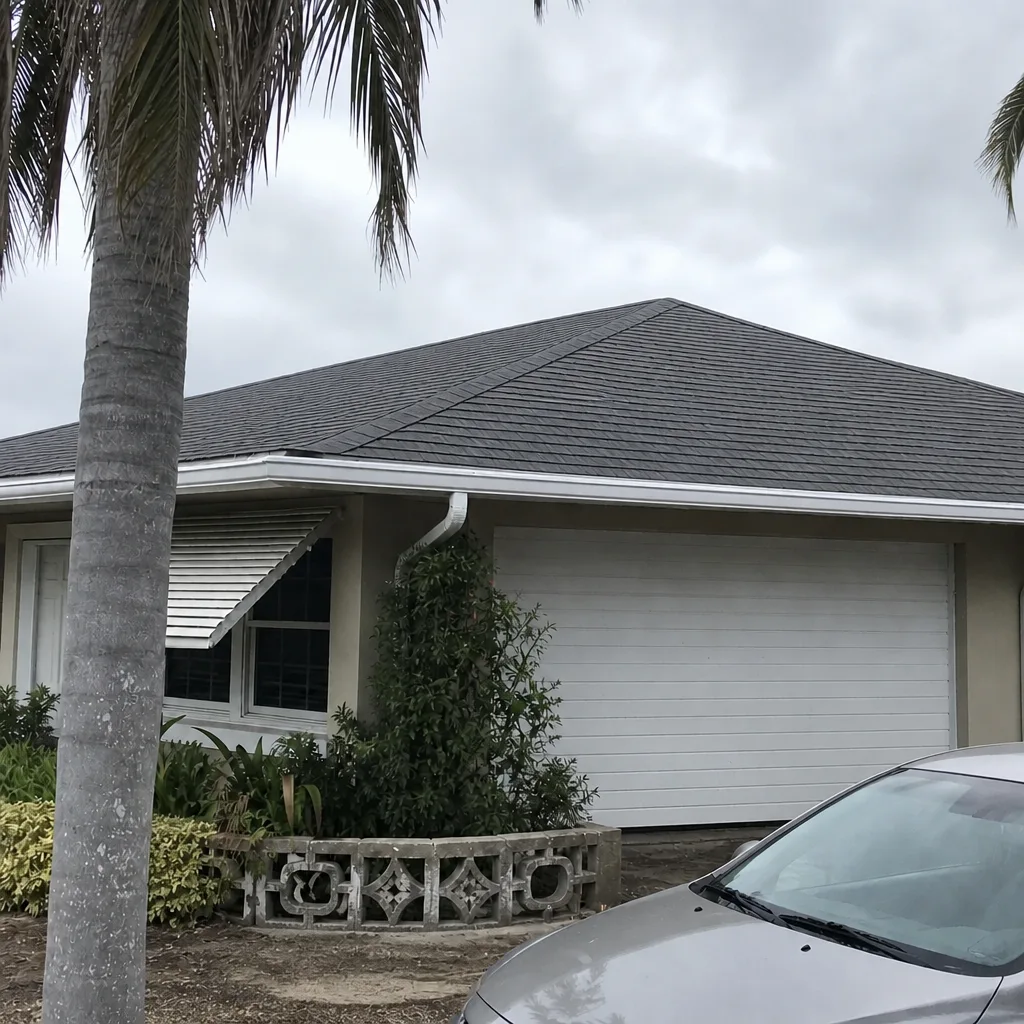 After
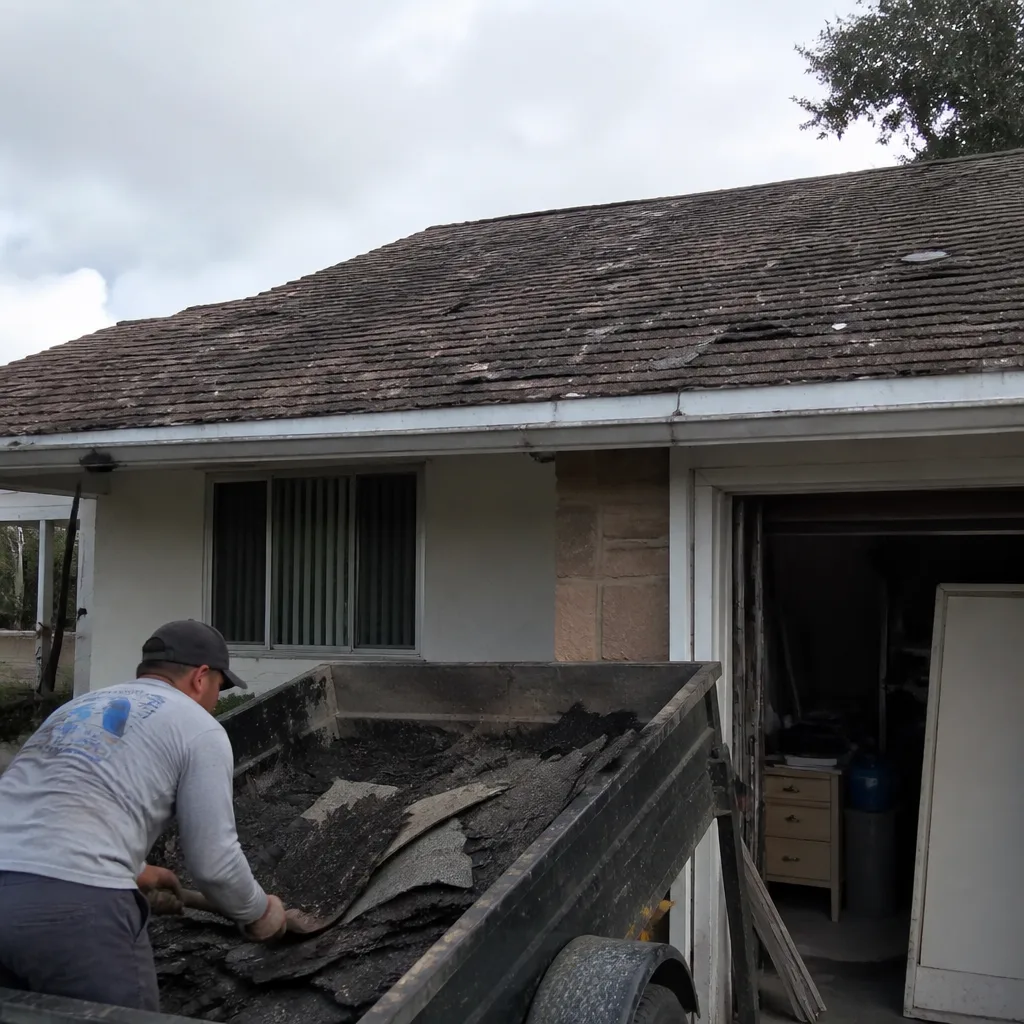 Before
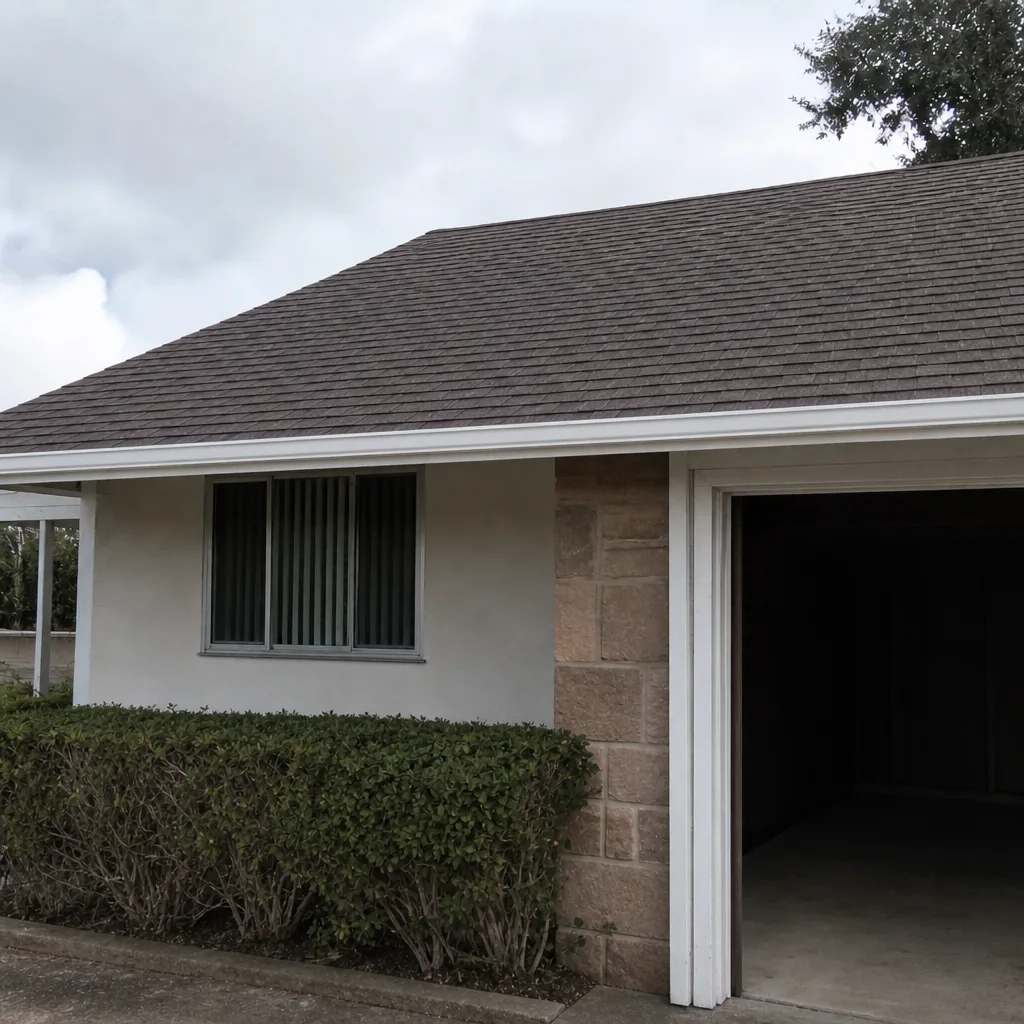 After
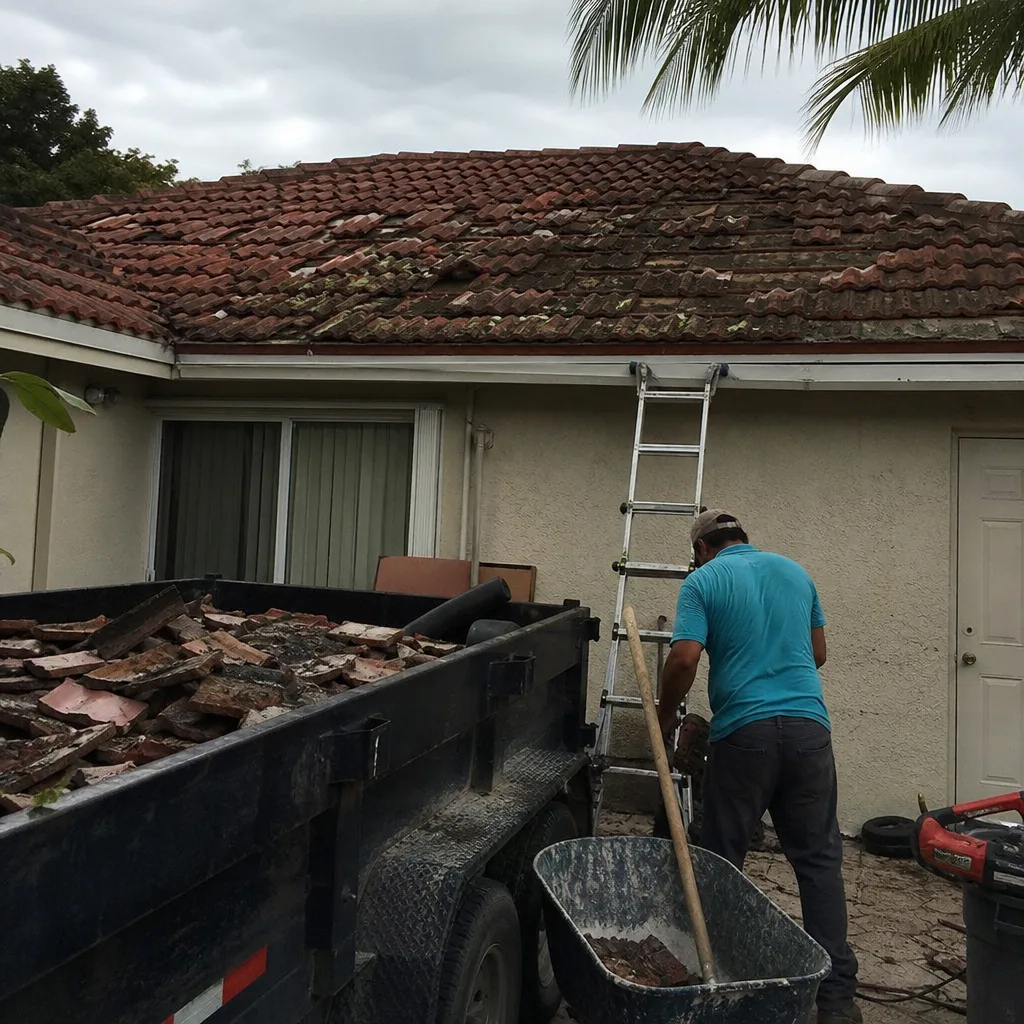 Before
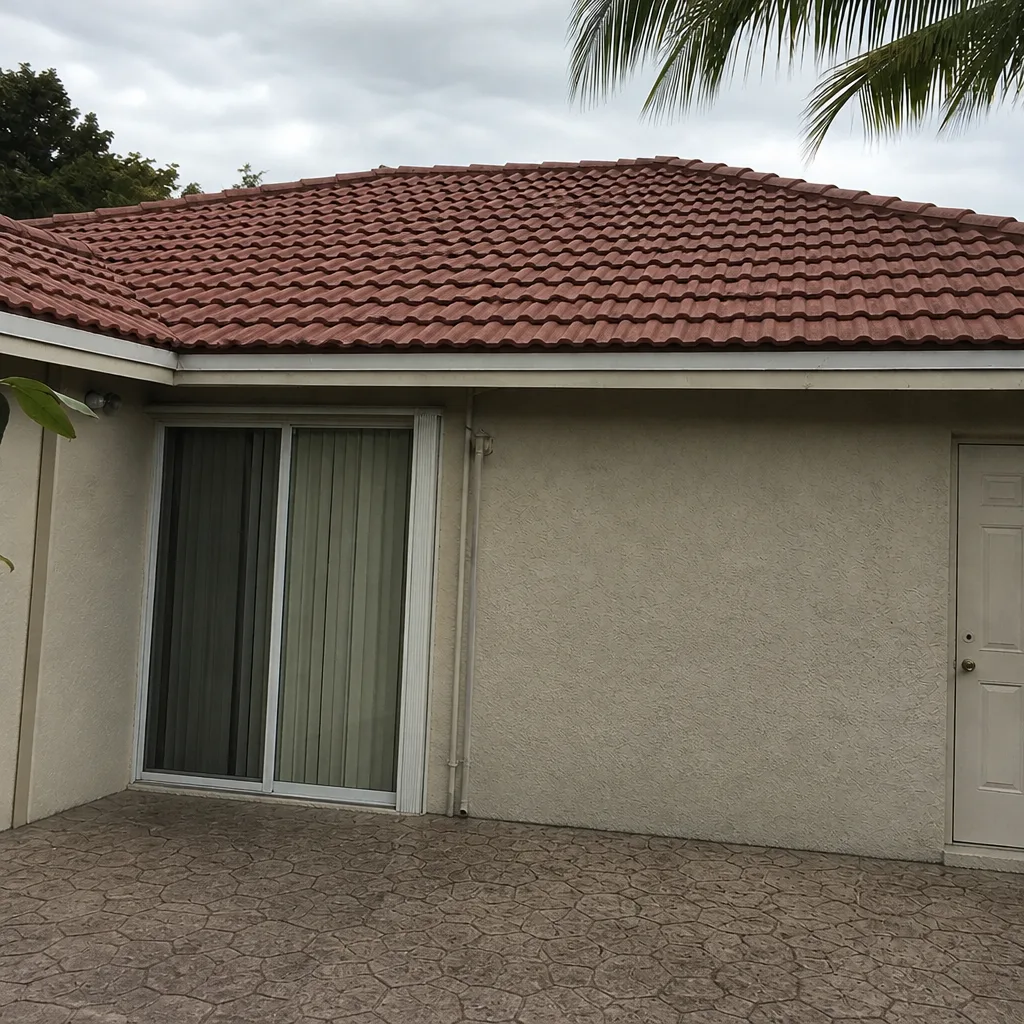 After
Frequently Asked Questions
Twice a year at minimum, plus a documented check after every named storm. In Pompano Beach, the dry season (roughly November through April) is the right window for tightening and inspection, and late spring is the pre-hurricane prep window. The rainy season is mostly monitoring. The reason for the twice-a-year cadence is that a lot of roof damage here is invisible until it’s already caused damage inside the house. Call (888) 361-4813 to schedule an inspection, free estimates.
You can do the ground-level and attic checks yourself. What you shouldn’t do is climb on the roof. Use binoculars from the yard and a flashlight in the attic. That catches a lot. But if you see window-shaped things you aren’t sure about – a sag, a lifted shingle, a stain on the decking – call a professional. The diagnosis is the part that’s worth the call. Call (888) 361-4813 for a free estimate.
The same day if you can safely do it from the ground, and always within a few days. The value of the photo is that it timestamps the damage to the storm. A wide shot plus a close-up of the specific problem, dated, is what you want. If you find damage, get it assessed while the date is still recent. Call (888) 361-4813 – we answer 24/7, fast dispatch from 7am to 7pm, Sunday through Friday.
If your home is close to the Intracoastal or the beach, yes. Salt-laden moisture in the air accelerates the breakdown of metal flashing and the corrosion of fasteners. That’s why the five-spot checklist – fasteners, flashing, roof-to-wall junction, valleys, and edge underlayment – matters more on homes near the water. We recommend an inspection at the same cadence as an inland home, but with more attention to those five spots. Call (888) 361-4813 for a free estimate.
A maintenance task prevents a repair. An upsell is a task sold without diagnosing whether the roof actually needs it. Clearing gutters, re-sealing penetrations, replacing cracked tiles, and checking the attic all prevent repairs with measurable effect. Aggressive pressure washing and blanket roof coatings are the two most common upsells. The right way to sort them is an inspection first, then a recommendation. Call (888) 361-4813 for a free estimate.
It depends on the roof. On a healthy roof, regular maintenance genuinely extends the life and catches small problems before they’re expensive. On a roof that’s already past its useful life, the money is treating symptoms rather than solving the problem. The honest answer comes from a diagnosis, not a sales call. We repair first, and replacement is only recommended when it’s genuinely the right answer. Call (888) 361-4813 for a free estimate.
The Bottom Line
The right roof maintenance checklist for Pompano Beach isn’t a generic list of ten items. It’s tied to the weather. Tighten and inspect in the dry season. Prep for hurricane season in late spring. Document and monitor through the wet season. Focus on the five risk spots – fasteners, flashing, the roof-to-wall junction, valleys, and the edge underlayment – because that’s where the damage shows up first. Check the attic before you check the ceiling. Take photos after every storm, date them, and keep them. And when something’s unclear, call a professional. The right order is inspection first, repair next, and a Rutherford Roof Repair replacement only if it’s the honest answer.
Call (888) 361-4813 for a free estimate. We answer 24/7. Fast dispatch from 7am to 7pm, Sunday through Friday.
Written by the team at Rutherford Roof Repair.